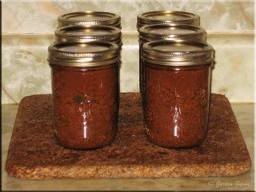
Haven't tried these yet but thought I would go ahead and share them since they looked so good.
!TO ANYONE THAT PREFERS I DO NOT SHARE THEIR RECIPES OR PICTURES, PLEASE NOTIFY ME AND I WILL REMOVE THEM ASAP!
Feed 4 People With One Chicken Breast
and they will get 2 servings each
1Chicken Breast; cooked and shredded
1 package Refrigerated Crescent Rolls
1 small 3-ounce package Cream Cheese
2 tablespoons Chopped Onion
1/2 cup Milk or Cream
1 can Cream of Chicken Soup
Preheat oven to 325º. Butter a 9×13 baking dish. Separate rolls. Blend cream cheese and onion well.
Place this mixture on the widest side of each crescent. Place some chicken on top of that; then roll up.
Place chicken crescents in baking dish Mix soup with milk and pour over all.Bake 45 minutes or until brown.
http://www.thehumblehomestead.net/Sneak_Peek.html
Canning Spaghetti Soup
3 lbs. spaghetti
3 stalks celery
3 lbs. navy beans (optional)
1 lb. butter
6 T. salt
4 T. chili powder
4 lbs. ground beef or turkey ham
4 onions
3 gal. tomato juice
3 C. brown sugar
several carrots
Cook everything until almost soft. Brown butter and add onions and meat. Mix everything together and *cold pack for 2 1/2 hours. (explanation for cold packing found at end of post)
http://amishrecipebox.com/Amish%20Recipes/Spaghetti%20Soup.html
Here's a link for some delicious looking
Chicken n Dumplings (my FAVORITE comfort food)
www.lanascooking.com
(sorry couldn't add the pic for it since it's copyrighted...but trust me...they look delicious and I will be trying this recipe first, lol)
Rosemary Parmesan Potatoes
http://www.mennonitegirlscancook.blogspot.com/
Canning Poor Man's Steak
30 lbs. hamburger
1 1/2 lbs. crackers
5 C. onions
5 C. celery
10 cans cream of mushroom soup (
homemade would be better!)
4 oz. Worcestershire sauce
2 dz. eggs
5 C. milk
salt & pepper
Directions
Mix all ingredients except soup. Form into patties. Place on cookie sheet and bake. Make brown pan gravy, not too thick. Then add soup. Put patty in can then gravy, patty, gravy, etc... Until can is full. Pressure can.
http://amishrecipebox.com/Amish%20Recipes/Poor%20Man's%20Steak%20To%20Can.html

*CANNING --- COLD PACK COLD-PACK METHOD
In the cold-pack method of canning the food material is blanched, that is, cooked for a certain length of time in boiling water or steam, and is then cold dipped, that is, quickly dipp...ed into cold water. It is then packed into clean hot jars. Hot water or syrup is usually added, the rubbers and tops adjusted so as partially to seal, and the cans are p]aced in hot water which completely covers them 2 or 3 inches. They are boiled for the required length of time and sealed. It is this method that is recommended and that is described in this bulletin. The advantages of this method are:
1. It does not require long standing over a hot stove.
2. The blanching in some cases reduces the bulk so that more may be packed in a can.
3. The quick change in temperature between the boiling and the cold water in the blanching and cold dipping process is supposed to create a condition favorable to the death of micro-organisms.
4. It is a safe method for canning vegetables.
EQUIPMENT
It is convenient and rather an encouragement to do canning to have set aside a few utensils to be used for this one purpose. The list should include the following: Half-pint measuring cup, paring knife, basin, tablespoons, teaspoons, kettle.
A colander or a wire frying basket may be helpful.
A duplex fork or coal tongs is best for lifting cans out of the hot water.
A strong wire may be bent with a hook at one end to use with the spring top jars or a pancake turner may be bent so as to slip under the jars and thus lift them.
Cheesecloth or some other thin cloth is needed for blanching and cold dipping, if the wire basket is not used.
Cans and rubbers and the canner, or sterilizer, complete the outfit.
HOME MADE HOT WATER BATH
This kind of a canner can be prepared in any home and with little expense. There must be a container with a close fitting cover and a false bottom. The container may be a wash boiler, a lard can, a new garbage can) or any straight sided pail. The false bottom is required to keep the cans off the bottom of the container so as to allow a free circulation of water about them. It may be constructed of laths nailed together with cross pieces, or it may be of perforated cake tins. Wire broilers or cake coolers serve the purpose nicely. The tinner can make a good one by cutting a piece of galvanized tin a little smaller than the size of the bottom of the canner, perforating this with one inch holes, and soldering on the under side some points that will raise it up one inch. Two strips of tin may be fastened at opposite sides, made a little shorter than the height of the canner, and when hooked at the top act as handles with which to lift the false bottom.
CANS AND JARS
Glass jars are always most desirable for home use. Any type of glass Jar may be used with the cold-pack method. The types may be described as follows:
Screw top jars have tops to be screwed on. The kind which has a screw band and a separate glass top is much better than the old style of one-piece top.
Spring top jars have glass tops that are clamped down by metal wires.
Vacuum sealed jars have metal tops with a rubber-like material on the edges that eliminate the use of rubber rings. During sterilization the tops are held in place by light clamps.
RUBBERS-All rubbers should be elastic and not too thick. When purchased, they should be tested to see how much "pull" they have. Their color makes no difference in the quality. Good rubber is not injured by several hours boiling.
TERMS USED IN CANNING
BLANCHING means boiling to remove objectionable flavors, to reduce bulk, to help kill bacteria.
COLD DIPPING means dipping quickly into and out of cold water to make handling easier and to help kill bacteria.
SCALDING means dipping into hot water long enough to remove the skin.
PROCESSING OR STERILIZING means heating long enough to kill micro-organisms.
TO SEAL PARTIALLY means that, in case of spring top jars, only the first wire is put into place on the top. The wire should fit into the glass top with a click. If it is too loose to do this, the wire should be removed and bent so as to fit tighter. In the case of screw top jars the tops are screwed down fairly tight, then turned back about a quarter turn. Vacuum sealed jars are partially sealed when the top is placed and the clamp fitted down over it.